While searching for something new overthere at banggood, I ordered some ESP8266 modules that are soldered to a dev board. The board is pretty awesome, has a solid quality and can be flashed without any trouble with a micro USB cable from your Arduino IDE. All you need to do is to follow some of the available tutorials on how to load the ESP Flash utility and you are ready to go.
While I was looking for a new project, I decided to use the ESP8266 for something I ever wanted - a simple temperature logging device at my balcony. I started to read a lot of tutorials and choose an old friend as a temperature sensor - the DS18B20. These are available in a waterproof housing and with up to 3m cable, which is perfect for measuring temperature not in the near of the powersupply.
DS18B20 basic working example
As the DS18B20 arrived, I started to test it with my Arduino Nano, to check if the basics are working, before I start over with the ESP8266.
First of all, I put a 4,7KOHM resistor between signal and vcc and connected it to pin 6. Everything works fine with this piece of code:
/* Benötigte Bibliotheken importieren */#include<OneWire.h>#include<DallasTemperature.h>#define ONE_WIRE_BUS 6 /* Digitalport Pin 2 definieren */OneWireourWire(ONE_WIRE_BUS);/* Ini oneWire instance */DallasTemperaturesensors(&ourWire);/* Dallas Temperature Library für Nutzung der oneWire Library vorbereiten */voidsetup(){delay(1000);Serial.begin(9600);sensors.begin();/* Inizialisieren der Dallas Temperature library */sensors.setResolution(TEMP_12_BIT);}voidloop(){delay(5000);sensors.requestTemperatures();// Temp abfragen
Serial.print(sensors.getTempCByIndex(0));Serial.println(" Grad Celsius");}
There are a lot of tutorials out there, so I don’t focus on this one.
Starting with the ESP8266
Because the DS18B20 is working really well, I started the development with the ESP8266. The onewire library used for the sensor is the same I used on my Arduino Nano - This worked instantly. What I wanted to do is, use the ESP8266 to read the temperature, connecto to the Wifi and send it to my server and then disconnect! All we need is the temperature, a connection to the wifi and a http client calling an url and printing stuff for debugging reason by serial interface (USB Cable). Another great benefit is the deep sleep mode of this modul (found it luckily while reading some information about the ESP8266). That means, this device can read the temperature, go to deep sleep, reset itself and run everything from the beginning, which is really nice and power saving!
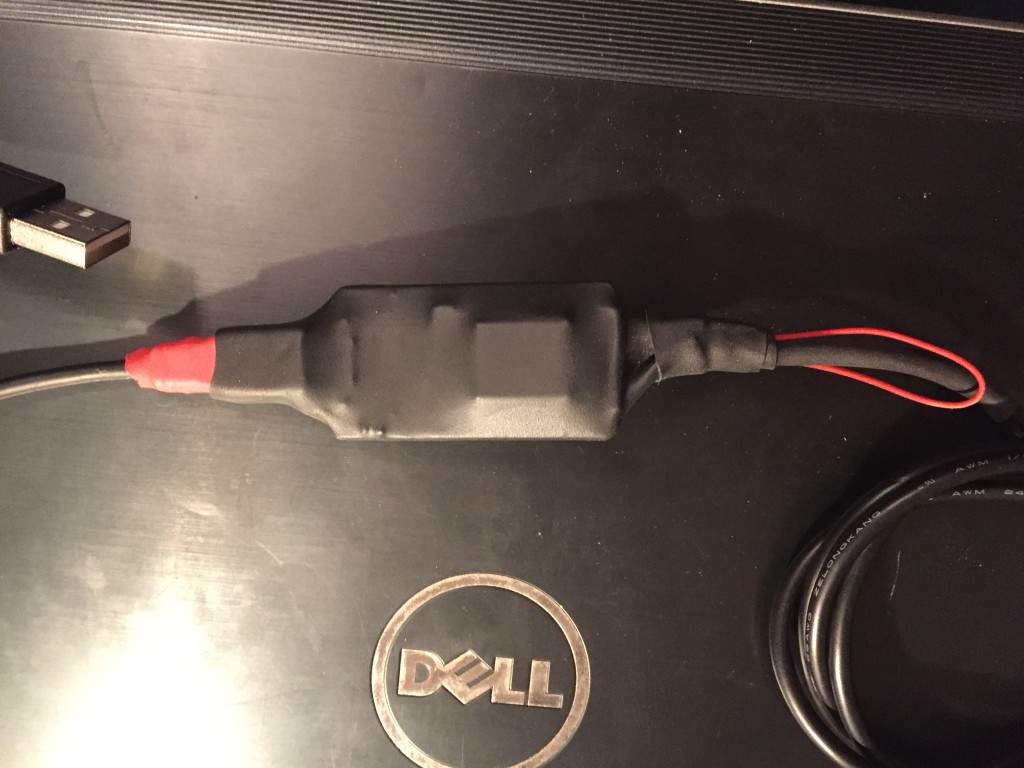
Because I want to use it outside, I stripped the pins from the devboard to make it as flat as possible, and put it into a heat shrink to make it a bit more robust against humidity and temperature.
/**
Version 2.0
- Verschiede Änderungen an den Plausis
- Aktualisierung der Serial Print ins deutsche mit sinnvollen Erweiterungen
Upcoming Version 2.1
- Eeprom zum Fehlerspeicher schreiben verwenden
*//* WIFI Stuff */#include<Arduino.h>#include<ESP8266WiFi.h>/* Sensor Stuff */#include<OneWire.h>#include<DallasTemperature.h>/* Misc Stuff *///#include <EEPROM.h>
#define ONE_WIRE_BUS D1 /* Digitalport Pin 2 definieren */OneWireourWire(ONE_WIRE_BUS);/* Ini oneWire instance */DallasTemperaturesensors(&ourWire);/* Dallas Temperature Library für Nutzung der
/* DS18B20 - Temperatursensor */constchar*ssid="martinrouterking";constchar*password="ihaveastream-notreally:D";constchar*host="custom.url.com";voidsetup(){// ### SERIAL
Serial.begin(115200);// Serielle Verbindung aufbauen
Serial.flush();// Einmal das Serielle Fenster Flushen, damit es leer ist
Serial.println("Starting Setup");// ### SENSOR ds18B20
sensors.begin();// Sensor Temperatursensor initialisieren
sensors.setResolution(TEMP_12_BIT);// Temperatursensor auf 12 BIT Auflösung einstellen
// Infos rausschreiben
Serial.println();Serial.print("Try to connect to the following Wifi: ");Serial.print(ssid);// ### WIFI Connect
WiFi.begin(ssid,password);while(WiFi.status()!=WL_CONNECTED){// Whileschleife wird solange ausgeführt, bis das WLAN Verbunden ist
delay(500);Serial.print(".");}// Infos rausschreiben
Serial.println("");Serial.println("WiFi uplink is running");Serial.println("Here is my local IP Address: ");Serial.println(WiFi.localIP());}voidloop(){// Einmalig die Temperatur aus dem Sensor lesen
sensors.requestTemperatures();floatfCurrentTemperature=sensors.getTempCByIndex(0);// Temperatur in einer Float Variable speichern
if(fCurrentTemperature>-100)// Wenn die Messung kein Crap war, dann Schleife ausführen
{// Infos rausschreiben
Serial.print("Connect to: ");Serial.println(host);// ### WIFIClient initialisieren
WiFiClientclient;if(client.connect(host,80)){// URL die aufgerufen werden soll generieren
Stringurl="/upload.php?temperature=";url+=fCurrentTemperature;// infos rausschreiben
Serial.print("Requesting URL for the call: ");Serial.println(url);// Einen HTTP GET Request generieren und abschicken
client.print(String("GET ")+url+" HTTP/1.1\r\n"+"Host: "+host+"\r\n"+"Connection: close\r\n\r\n");delay(10);// 10 milisekunden warten
// Read all the lines of the reply from server and print them to Serial
while(client.available()){Stringline=client.readStringUntil('\r');//Serial.print(line);
}Serial.println("Website was called, closing connection");Serial.print("Current temperature is: ");Serial.print(fCurrentTemperature);Serial.println(" Degree ");}else{// Error schreiben
//EEPROM.write(4, 1);
Serial.println("Connection lost");}}else{// Error, wenn der Sensor einen falschen Wert ausgibt!
Serial.println("Error: Check DS18B20 Connection - Temperature is below -100 -");}// ### DEEP SLEEP
// Was immer auch passiert, es wird erstmal 5 Minuten gepennt
Serial.println("Now I need to take a nap for 5 Minutes");ESP.deepSleep(300*1000000);}
This is pretty little code for this functionality.
All you need to do is writing your own php script, to store the data in the database and put them on a website. Beside this, you can upload the temperature to one of these iot services, that fetch all your data and show them to you on a website. Just search for online data logging, and you can choose the best matching!
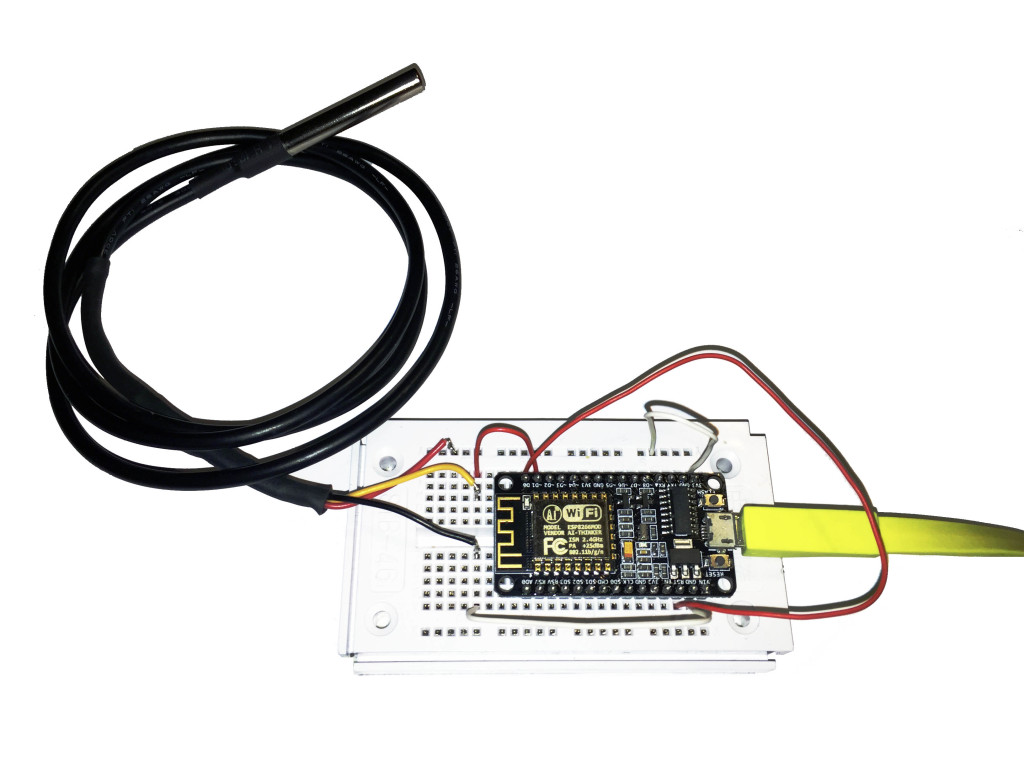
Some information on wiring everything up.
For deepsleep, just connect D0 with the reset pin.
For DS18B20 use D1 pin (and 3.3v + GND)
Benefits on using the dev board:
Updating is simply done by USB (disconnect the deepsleep connection, or you won’t be able to update it).
Power it with 5V
That it, pretty simple. Here are some pictures of this project